Introducing Interactive Command

Watch these feature updates from our YouTube channel if you are a visual learner.
Introduction
Until now, NotifyXF allows you to use commands to request certain data directly from Telegram like this.
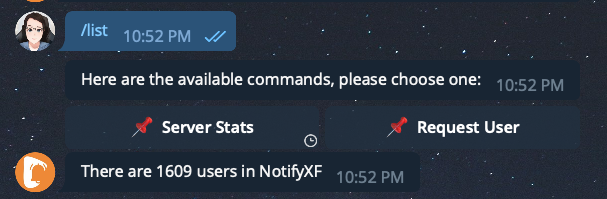
This has worked very well for very simple cases where you could just directly send a request to your API endpoint.
However, there are times when you would like to request some form of data based on dynamic info like this.
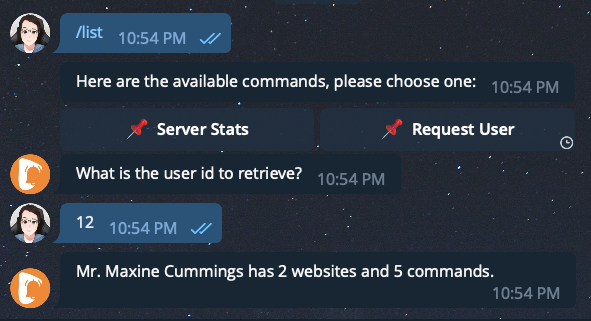
This is now possible with our new feature Command with Parameter. When you create a command, you now have the option to add parameters.
If you have no idea how command works, I've written all about it in our article Display custom metrics and text in Telegram
It's very easy to use parameters. Now, whenever you are creating a new command, you have the option to add parameters.
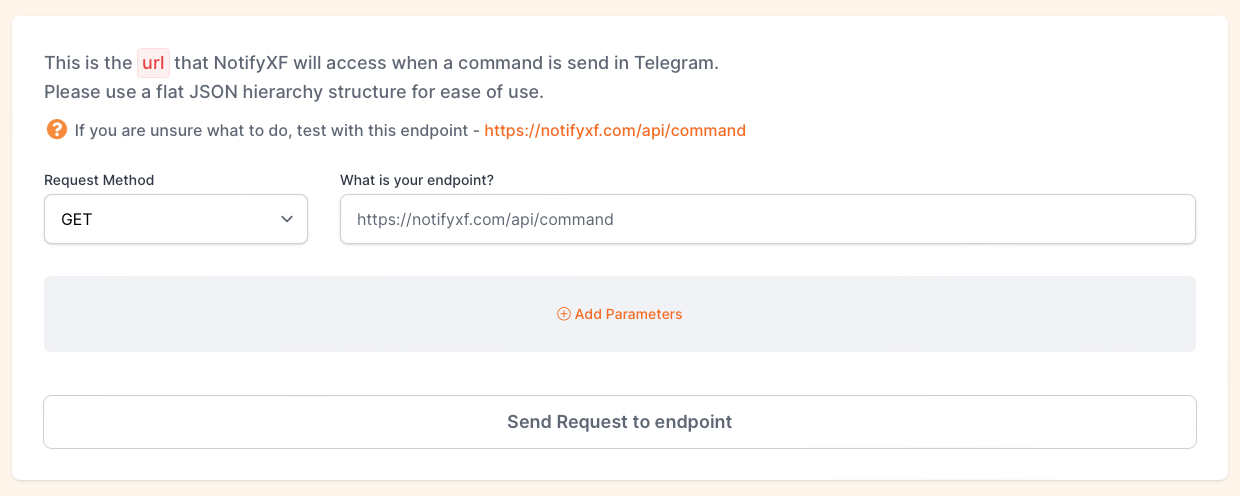
Click on Add Parameters
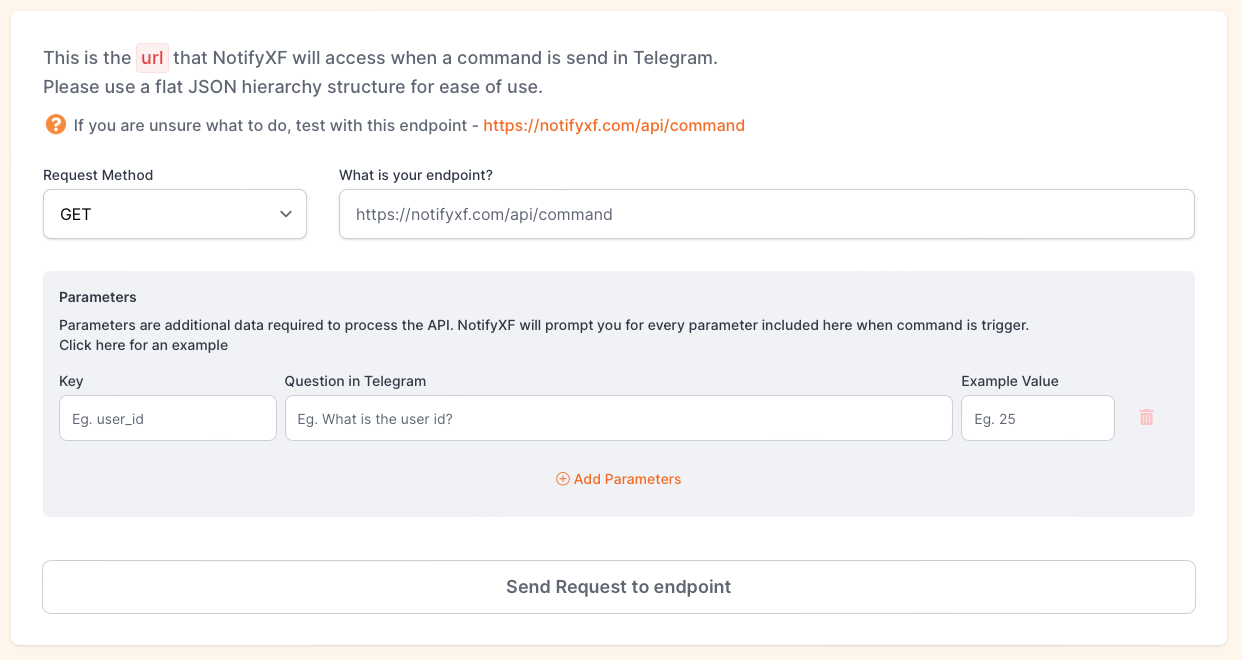
You will be able to fill in 3 inputs.
- Key
- Question in Telegram
- Example Value
Key refers to the name of the parameter used when sending request to api endpoint.
Question in Telegram contains the question that NotifyXF bot (Kayla) will ask in Telegram to get the value for the above key.
Example Value is the value to use for this particular page when we would like to simulate a request later on.
You can also choose which request method you would like to use.
- GET
- POST
- DELETE
- PUT
Here's an example of how this request will look like in Laravel
<?php

use Illuminate\Support\Facades\Http;

$response = Http::post("https://notifyxf.com/api/command", [
    'user_id' => "25",
]);
and here's an example in node
const axios = require('axios')

axios.post('https://notifyxf.com/api/command', {
    user_id: "25",
})
That's all! It's as easy as that!
This feature though looks seemingly simple at the front end has some complexity at the back end. It may have taken a bit of time (about 3 months) to get this feature ready. But I'm really excited about this as it opens up even more possibilities of what this could do.
I'm going to be writing a future article on example use cases and actual use cases of how I use this feature.
Till then. Thank you for reading till the end!
You can also give it a try by heading over to NotifyXF and sign up! It's free!
